What to Do When a Check Valve Has Backflow, Noise, or Sticking?
A check valve, also known as a non-return valve or one-way valve, is a commonly used automatic protection valve in industrial fluid piping systems. It does not require manual operation or an external power source. Instead, it opens and closes automatically through the pressure difference created by fluid flow.
The main function of a check valve is to restrict the fluid to one-way flow and prevent backflow when the pump stops or when system pressure changes, thereby protecting pumps, compressors, heat exchangers, filters, and other upstream equipment.
In water supply and drainage, chemical processing, HVAC systems, oil and gas transportation, pump discharge lines, and circulating water systems, check valves usually operate continuously for long periods. As operating time increases, the valve may be affected by impurities, corrosion, wear, spring fatigue, installation deviation, and flow fluctuations, gradually leading to the following failures:
- Fluid backflow;
- Abnormal opening and closing noise;
- Disc sticking or seizure;
- Frequent disc fluttering;
- Poor sealing;
- Increased pipeline vibration;
Reverse rotation of the pump after shutdown.
At the initial stage, these problems may only appear as slight noise or vibration. However, if they are not inspected and corrected in time, they may further cause water hammer, pump damage, pipeline leakage, and system shutdown.
This article explains the causes and treatment methods of check valve backflow, noise, and sticking from the perspectives of working principle, failure symptoms, cause analysis, repair procedures, acceptance criteria, and preventive maintenance.
Check Valve Structure and Working Principle
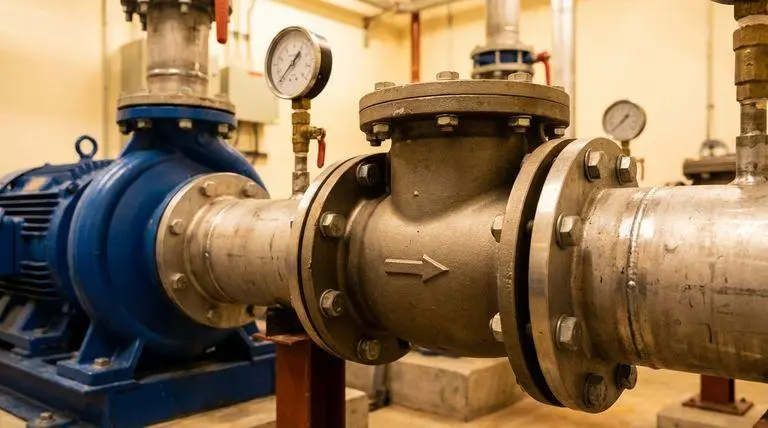
Common types of check valves include:
- Swing check valves;
- Lift check valves;
- Spring-loaded check valves;
- Wafer check valves;
- Axial-flow check valves;
- Dual-plate check valves.
Although different check valve types have certain differences in disc structure, installation direction, and closing method, their basic working principles are similar.
When the fluid flows in the specified direction, the upstream pressure pushes the disc open, allowing the fluid to pass smoothly through the valve. When the system stops, the pump stops running, or the downstream pressure becomes higher than the upstream pressure, the disc returns to the valve seat under its own weight, spring force, or reverse fluid pressure, cutting off the flow passage and preventing reverse flow.
Whether a check valve can operate reliably usually depends on the following factors:
- Whether the disc opens and closes freely;
- Whether the sealing surfaces of the seat and disc are intact;
- Whether the shaft, hinge, or guide mechanism moves smoothly;
- Whether the spring restoring force is normal;
- Whether the valve installation direction meets the design requirements;
- Whether the pipeline flow rate and pressure are stable;
- Whether the selected valve type matches the actual operating conditions.
Under normal operating conditions, a qualified check valve should open and close flexibly, close reliably, and operate smoothly. It should not show obvious sticking, impact, continuous fluttering, or fluid backflow.
Quick Troubleshooting Table for Common Check Valve Failures
| Failure Symptom | Possible Cause | Recommended Action |
|---|---|---|
| Fluid backflow after pump shutdown | Disc sticking, spring failure, damaged sealing surface, or debris obstruction | Clean the valve cavity, inspect the disc and spring, and repair or replace the sealing components |
| Continuous abnormal valve noise | Frequent disc opening and closing, insufficient flow, pressure pulsation, or unstable installation | Check the flow conditions, installation condition, and valve selection |
| Disc cannot open | Corroded shaft, stuck guide mechanism, debris blockage, or insufficient differential pressure | Disassemble and clean the valve, and check the cracking pressure and flow direction |
| Disc cannot close | Broken spring, debris trapped on the sealing surface, or disc deformation | Replace the spring, clean the sealing surface, and inspect the disc |
| Obvious pipeline vibration | Disc fluttering, water hammer, excessive flow velocity, or insufficient pipeline support | Optimize startup and shutdown speed, and inspect the pipeline supports and valve type |
| External valve leakage | Loose flange bolts, damaged gasket, or valve body defect | Retighten the bolts, replace the gasket, and inspect the valve body |
| Internal leakage or poor sealing | Scratched, eroded, deformed, or contaminated sealing surfaces | Clean, lap, or replace the sealing components |
Main Causes of Check Valve Backflow, Noise, and Sticking
Corrosion and Sticking of the Disc, Shaft, or Hinge
The internal moving parts of a check valve are exposed to water, water vapor, corrosive fluids, or humid environments for long periods and are therefore prone to corrosion.
Rust, scale, sediment, and suspended particles may accumulate around the shaft, hinge, and guide clearances, increasing friction and restricting disc movement.
When the disc is slightly stuck, the valve usually shows symptoms such as unsmooth opening and closing, jerky movement, or intermittent abnormal noise. When the sticking becomes severe, the disc may be unable to close completely, resulting in continuous fluid backflow after pump shutdown.
Fatigue or Breakage of the Return Spring
Some spring-loaded, wafer, or axial-flow check valves rely on spring force to help the disc close quickly.
After long-term compression, release, and alternating loading, the spring may develop the following problems:
- Reduced spring force;
- Permanent deformation;
- Spring misalignment;
- Corrosion thinning;
- Fatigue breakage.
When the spring restoring force is insufficient, the disc closes more slowly and cannot press tightly against the seat, which may cause backflow, internal leakage, and impact.
When replacing the spring, its material, dimensions, stiffness, and cracking pressure should be consistent with the original design. The problem should not be solved simply by increasing the spring stiffness, because an excessively strong spring may increase the valve opening differential pressure and system pressure loss.
Damage to the Disc and Seat Sealing Surfaces
Solid particles, welding slag, rust, and crystallized deposits in the fluid continuously erode the sealing surfaces. Frequent impact between the disc and valve seat may also cause scratches, dents, deformation, and localized wear.
After the sealing surfaces are damaged, reverse leakage may still occur even when the disc has already closed.
For metal-seated check valves, minor scratches may be repaired by lapping or other repair methods according to the manufacturer’s requirements. For soft-seated structures using rubber, PTFE, or other materials, the sealing ring should be checked for aging, tearing, or detachment. If necessary, it should be replaced directly instead of being lapped without proper evaluation.
Foreign Material Blocking the Disc Travel
Residual welding slag, metal chips, and construction debris in newly installed pipelines, as well as rust, sand, and scale generated during long-term operation, may enter the check valve.
Foreign material may become trapped in the following areas:
- Between the disc and valve body;
- Between the disc and valve seat;
- Around the shaft or hinge;
- Between the stem and guide sleeve;
Around the spring.
When debris becomes trapped, the disc may be unable to close completely, causing continuous internal leakage. It may also prevent the valve from opening fully, resulting in insufficient flow and increased pressure loss.
Incorrect Valve Installation Direction or Position
The valve body of a check valve is usually marked with a flow-direction arrow. During installation, the arrow must point in the same direction as the actual fluid flow.
Different types of check valves have different installation-position requirements. For example, some lift check valves are suitable for horizontal pipelines, while some spring-loaded check valves can be installed in horizontal or vertical pipelines. Whether a swing check valve is suitable for vertical installation should be confirmed according to the fluid direction and the manufacturer’s requirements.
Common installation problems include:
- Incorrect flow direction;
- Valve body installed at an angle;
- Flange misalignment;
- Pipeline misalignment;
- Additional pipeline stress applied to the valve;
- Insufficient straight pipe length upstream or downstream;
Installation too close to the pump discharge or in a turbulent-flow area.
These problems may cause uneven disc wear, restricted movement, misaligned closure, poor sealing, continuous impact noise, and vibration.
Insufficient Flow or Pressure Pulsation
A lower flow rate does not necessarily mean that the check valve will operate more safely.
When the actual flow is lower than the flow required to keep the disc in a stable open position, the disc may repeatedly move between the open and closed positions.
This condition is usually called disc fluttering or chattering. Common symptoms include:
- Continuous knocking noise;
- Valve body vibration;
- Pipeline resonance;
- Rapid wear of the disc and seat;
- Accelerated spring and shaft fatigue.
Frequent pump starts and stops, fluctuating discharge pressure, and unstable flow regulation may also cause similar problems.
Oversized Valve or Incorrect Valve Structure
The size of a check valve should be selected according to the pipeline size, fluid flow rate, velocity, pressure loss, and cracking pressure. It should not be selected only according to the nominal pipeline diameter.
If the check valve is oversized, the actual flow may not be sufficient to fully open the disc, which may cause the disc to remain suspended, flutter, and impact the seat.
For pump discharge systems, high-pressure systems, rapidly starting and stopping systems, or pipelines with a high risk of water hammer, a check valve structure with a shorter closing stroke and faster dynamic response should be selected according to the actual operating conditions.
What Hazards Can Check Valve Failures Cause?
Reverse Rotation of the Pump After Shutdown
When the check valve does not close tightly, fluid in the discharge pipeline may flow backward and impact the pump impeller, causing the pump to rotate in reverse.
Long-term reverse rotation may damage the bearings, mechanical seals, couplings, and impeller, and may also affect the next pump startup.
Pipeline Water Hammer
When the check valve closes too slowly, the fluid may develop a certain reverse velocity before the disc closes. The disc then suddenly closes and creates an instantaneous pressure impact.
A valve that closes too quickly may also cause pressure fluctuations if the system lacks proper buffering. Therefore, water hammer cannot be solved simply by increasing spring force. The valve closing characteristics, fluid velocity, pipeline length, and pump startup and shutdown method must be analyzed together.
Severe water hammer may cause:
- Violent pipeline vibration;
- Loose flanges and bolts;
- Gasket damage;
- Weld fatigue;
- Pipeline leakage or rupture;
- Damage to pressure instruments and accessories.
Abnormal System Pressure and Flow
Fluid backflow can disrupt the original pressure and flow balance of the piping system, affecting circulation, heat transfer, filtration, and transportation performance.
In chemical systems or systems connecting different fluids, backflow may also cause fluid mixing, contamination, or abnormal process parameters.
Increased Equipment Maintenance Costs
Continuous fluttering, impact, and sticking accelerate the wear of the disc, spring, shaft, and sealing surfaces.
A problem that could initially have been solved by cleaning may gradually develop into a serious failure requiring replacement of the entire valve.
Standardized Check Valve Disassembly and Repair Procedure
Check valve repair should follow the sequence of safe isolation, fault confirmation, disassembly and inspection, cleaning and repair, reinstallation, and operating verification.
Step 1: Shut Down, Isolate, and Depressurize
Before maintenance, close the isolation valves upstream and downstream of the check valve, stop the relevant pump, and drain the fluid from the pipeline.
For high-temperature, toxic, flammable, corrosive, or high-pressure fluids, the corresponding flushing, purging, cooling, and gas-testing procedures should also be performed.
Lockout and tagout measures should be implemented, and the valve should only be removed after confirming that there is no pressure inside the pipeline.
Step 2: Record the Installation Condition
Before removing the valve, record the following information:
- Valve flow direction;
- Installation orientation;
- Valve model and specification;
- Flange connection condition;
- Upstream and downstream pipeline positions;
- Location of abnormal noise and vibration;
- Pump operating parameters;
- Time and frequency of the failure.
Photographs or videos may be taken when necessary to provide a reference for analyzing installation deviations and reinstallation.
Step 3: Disassemble and Clean the Internal Components
Disassemble the valve cover, disc, spring, shaft, hinge, and guide components according to the manufacturer’s instructions.
Remove sediment, rust, scale, oil, and other contaminants from the valve cavity, with particular attention to the following areas:
- Valve seat sealing surface;
- Disc edge;
- Shaft and bushing;
- Hinge connection;
- Spring installation position;
- Guide sleeve and travel-limiting mechanism.
Cleaning agents that may damage the sealing materials should be avoided.
Step 4: Inspect the Disc, Shaft, and Spring
Inspect the disc for deformation, cracks, erosion, wear, or looseness.
The shaft and hinge should move freely and should not have severe corrosion, bending, or excessive clearance. Minor surface corrosion may be cleaned and repaired. If the component dimensions exceed the allowable wear tolerance, the relevant parts should be replaced.
When inspecting the spring, check its length, elasticity, surface corrosion, misalignment, and cracks. If the spring force has clearly decreased or if the spring is permanently deformed or broken, it should be replaced with a spring of the same specification.
Step 5: Inspect and Repair the Sealing Surfaces
After cleaning the disc and valve seat sealing surfaces, check them for:
- Scratches;
- Dents;
- Erosion grooves;
- Corrosion spots;
- Detached sealing rings;
- Valve seat deformation.
Minor defects on metal sealing surfaces may be repaired by lapping or machining according to the maintenance standard. If the defects are severe, the sealing components or the complete valve should be replaced.
For soft-seated valves, check whether rubber, EPDM, NBR, PTFE, or other sealing materials have aged, hardened, cracked, or detached.
Step 6: Reassemble and Check the Valve Movement
After cleaning and replacing the necessary parts, reassemble the check valve according to its original structure.
After reassembly, manually check and confirm that:
- The disc opens smoothly;
- The disc closes without sticking;
- The spring is installed correctly;
- The shaft and hinge have no abnormal looseness;
- The disc and valve seat align properly;
- No fasteners are missing.
Step 7: Correct the Installation Condition
During reinstallation, confirm the correct fluid direction and determine whether the valve should be installed horizontally or vertically according to the manufacturer’s requirements.
When connecting the flanges, do not correct pipeline misalignment by forcibly tightening the bolts. The pipeline should be naturally aligned, and the flange bolts should be tightened evenly in a diagonal sequence to prevent valve body deformation and uneven gasket loading.
Pipeline supports should also be checked to prevent the valve from bearing excessive pipeline weight, thermal expansion force, or mechanical stress.
Commissioning and Acceptance Criteria After Repair
After the check valve has been repaired and reinstalled, it should not be put into full-load operation immediately. The system should be commissioned through gradual pressurization and staged testing.
Static Inspection
Confirm that the valve installation direction, connecting bolts, gaskets, supports, and accessories meet the requirements and that there is no visible damage to the valve body.
Slowly Introduce the Fluid
Slowly open the upstream valve and gradually pressurize the pipeline. Check the flanges, valve cover, and valve body for external leakage.
Check the Forward Opening Condition
After starting the pump, observe whether the system flow and pressure are normal. The valve should not show obvious sticking, continuous impact, or abnormal vibration while opening.
Conduct Pump Shutdown Tests
Under permitted operating conditions, conduct several startup and shutdown tests and observe whether the following problems occur when the pump stops:
- Obvious fluid backflow;
- Reverse pump rotation;
- Severe water hammer;
- Disc impact;
- Abnormal pipeline vibration.
Check Closing and Sealing Performance
Confirm that the disc can return to the seat in time and that reverse leakage after closing does not exceed the allowable limit.
The specific leakage acceptance criteria should be determined according to the valve design standard, the manufacturer’s technical documents, and the project requirements. “Absolute zero leakage” should not be used as the same acceptance criterion for all check valves.
Check Valve Repair Case Study
A wafer check valve was installed on the discharge line of a circulating-water pump in an industrial workshop.
After long-term operation, continuous knocking noise and obvious pipeline vibration occurred. After the pump stopped, the discharge fluid flowed backward and caused the pump impeller to rotate in reverse.
After shutdown, isolation, drainage, and pressure relief, the maintenance personnel removed and inspected the check valve. The following problems were found:
- The shaft and hinge were severely corroded, causing restricted disc movement;
- Sediment and scale had accumulated inside the valve cavity;
- The return spring had experienced long-term alternating loading, and its elasticity had clearly decreased;
- The disc sealing surface showed slight erosion and scratches;
- The valve was installed at a slight angle, causing uneven force on the disc.
The maintenance personnel thoroughly cleaned the valve cavity and moving components, removed corrosion and debris from the shaft and hinge, replaced the return spring with a new spring meeting the original design requirements, and repaired the metal sealing surfaces.
During reinstallation, the valve direction and pipeline alignment were corrected, and the flange bolts were tightened evenly according to the specified sequence.
After the repair was completed, several water-flow and pump startup and shutdown tests were conducted. The check valve opened smoothly, and the original impact noise and pipeline vibration disappeared. After the pump stopped, the disc closed in time, and no obvious fluid backflow or reverse pump rotation occurred.
This case shows that check valve backflow and noise are often not caused by the failure of a single component. Instead, they may result from the combined effects of corrosion, spring fatigue, sealing-surface wear, impurity accumulation, and installation deviation.
How to Prevent Check Valve Backflow and Sticking
Keep the Pipeline Clean and Drain Contaminants Regularly
Before a new pipeline is put into service, welding slag, iron chips, and construction debris should be thoroughly removed.
During operation, the system should be drained regularly according to the fluid condition to prevent contaminants from entering the check valve.
A filter may be installed upstream of the valve when necessary. However, the filter screen must also be cleaned regularly to prevent blockage and abnormal differential pressure.
Regularly Check Noise and Vibration
Operators should pay attention to knocking noise, vibration, pressure fluctuations, and backflow near the check valve.
Slight abnormal noise may be an early sign of disc fluttering or moving-component wear and should be inspected in time to prevent the problem from developing into a serious failure.
Regularly Inspect Internal Wear Components
A suitable inspection interval should be established according to the corrosiveness of the fluid, startup frequency, and operating time.
Key inspection items include:
- Spring performance;
- Disc wear;
- Shaft and hinge corrosion;
- Sealing-surface damage;
- Sealing-ring aging;
- Loose fasteners.
The specific maintenance interval should be determined according to the importance of the equipment and actual operating conditions. A fixed quarterly or annual disassembly interval should not be applied to every system without evaluation.
Ensure Proper Installation
When installing a check valve, strictly confirm the flow direction, installation position, flange alignment, and pipeline support.
Do not correct pipeline misalignment by forcibly tightening bolts, and do not allow the valve to bear additional pipeline weight or thermal stress for a long period.
Optimize Pump Startup and Shutdown
For systems prone to water hammer, instantaneous pressure changes can be reduced by using variable-frequency startup, slow valve operation, optimized pump startup and shutdown sequences, or additional water-hammer protection equipment.
Select the Correct Valve According to the Operating Conditions
When selecting a check valve, the following factors should be considered:
- Fluid type;
- Operating temperature;
- Operating pressure;
- Normal flow rate;
- Minimum flow rate;
- Fluid velocity;
- Allowable pressure loss;
- Cracking pressure;
- Installation direction;
- Pump startup and shutdown frequency;
- Water-hammer risk.
For systems with frequent startup and shutdown, obvious flow fluctuations, or high water-hammer sensitivity, a check valve structure with a shorter closing stroke and faster response should be evaluated first.
Frequently Asked Questions
Why Does a Check Valve Make a Continuous Knocking Noise?
Continuous knocking usually means that the disc cannot remain in a stable open position and is repeatedly moving between the open and closed positions under the effects of fluid force and restoring force.
Common causes include low flow, pressure pulsation, an oversized valve, spring problems, or installation in a turbulent-flow area.
Does Check Valve Backflow Always Mean That the Sealing Surface Is Damaged?
No. In addition to sealing-surface wear, backflow may also be caused by disc sticking, debris blockage, spring failure, incorrect installation direction, or disc deformation. A comprehensive inspection is required before confirming the root cause.
Should a Failed Check Valve Be Repaired or Replaced?
If the valve structure is intact, the sealing-surface damage is minor, and spare parts are available, the valve may be repaired.
If the valve body is severely corroded, the disc is deformed, the sealing surface cannot be repaired, the repair cost is too high, or the valve structure is unsuitable for on-site maintenance, replacing the valve is usually more appropriate.
Conclusion
Although a check valve has a relatively simple structure, it is an important device for preventing fluid backflow, protecting pumps, and maintaining stable pipeline operation.
When a check valve experiences backflow, abnormal noise, sticking, or vibration, the inspection should cover disc movement, spring condition, sealing-surface damage, internal contaminants, installation method, fluid flow rate, and valve selection. The problem should not be judged only from the surface symptoms.
By following a standardized repair process—including shutdown and pressure relief, disassembly and cleaning, component inspection, sealing repair, proper installation, and operating verification—most common check valve failures can be effectively resolved.
At the same time, maintaining clean pipelines, monitoring equipment conditions, selecting the correct valve, ensuring proper installation, and optimizing pump startup and shutdown can reduce disc fluttering, fluid backflow, and water-hammer risks, thereby extending the service life of both the check valve and the entire piping system.

Get professional pre-sales technical consultation and valve selection services, customized solution services.

About CEPAI
Popular Blogs